Control Panel
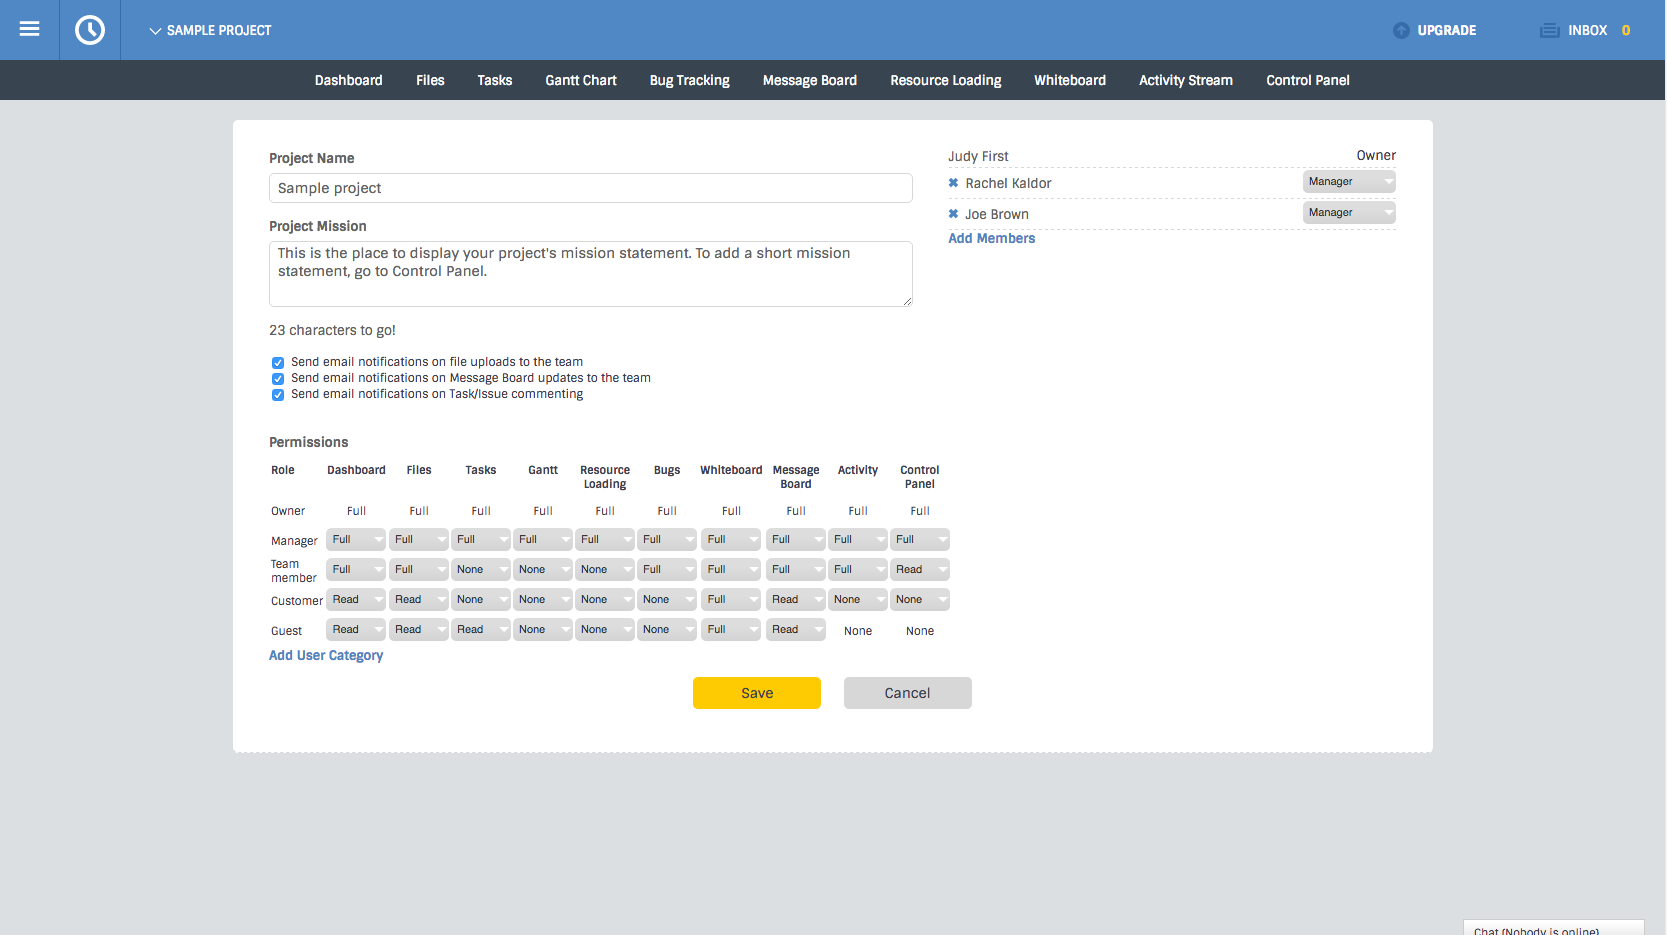
The project control panel is your project’s mission control room. Every project in Sagekick has its own control panel. The control panel is where you add people to your project, give them permissions and rules and a lot more. In the following I have shown all you can do in this page to manage your team and project.
- Title: you can change the title here. Click your mouse here and type the new title
- Description: Write a brief description for your project. Think of it as the mission statement of your project
- Notification: You can let the application know when to send email notifications
- User categories: Sagekick by default has the following user categories, manager, team member, customer and quest. You can add others like tester, auditor etc
- Permissions: For each user category you can give permission to each page and feature in Sagekick
- Add members: You can add members from your workspace, or invite new members by email. People added from the workspace, are automatically added to the project and get an email notification. People you add via email, will get an email which they need to confirm before they are added to the project. If the quota for plan is reached, you get a popup to inform you that you need to upgrade your plan.
After any change to this page, make sure to press save button before leaving the page. All changes are only accepted if they are saved. It is a good idea to give access to this page only to project manager and the admin in your workspace.
 Prev: Next: Project Report